Guide to stitches used in my patterns.
On this page you will find a brief description and guide on how to sew the different stitches you will come across in my animal patterns. There are many internet tutorials on how to use these stitches and practice will make perfect as with anything. As I state in my instructions you can always choose to use alternative stitches, as preferred, in your animal construction.
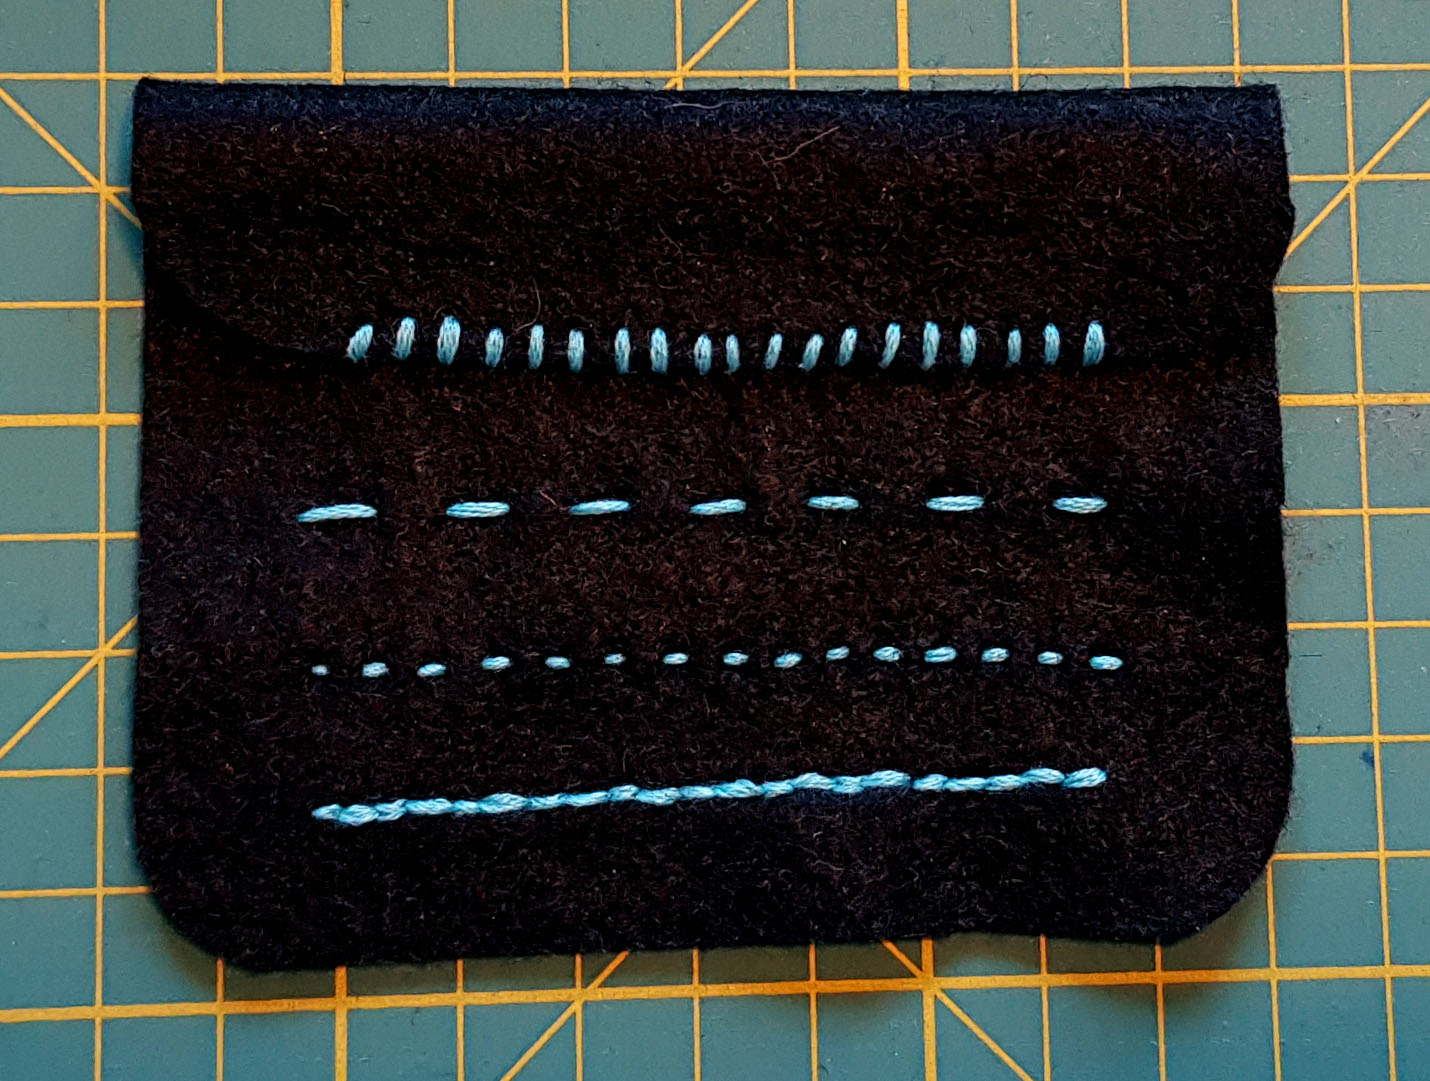
Over stitch
I choose to use an over stitch with most of my animal construction.
Also called whip stitch, is a simple stitch where you join two layers of felt by bringing the needle up from the back of the material through to the front before taking it back round over the edge of the material to the back and repeating.
This stitch can look sloped. You should use a single thread and keep your stitches at a consistent distance and at a depth of about 2-3mm.
Tacking stitch
Often referred to as basting, this stitch is a temporary stitch intended to be removed. It is often used to hold a seam or trim in place until it can be permanently sewn in place.
To make a tacking stitch sew a long stitched running stitch by threading your needle in and out through the fabric at a regular distance.
Running stitch
A basic sewing stitch but useful for many applications. Starting behind your work bring the needle up and then take it back down a short distance away. Your next stitch needs to be an equal distance away matching the length of your first stitch. Bring your needle up and then back down a short distance away. It will look neater if you manage to keep your stitches of an even length.
DOUBLE running stitch
This is a great stitch to use to make the back and front of your work look the same. After completing a line of running stitch simply turn around and go back again with running stitch to fill in the gaps. Accuracy is needed to avoid wonky lines.
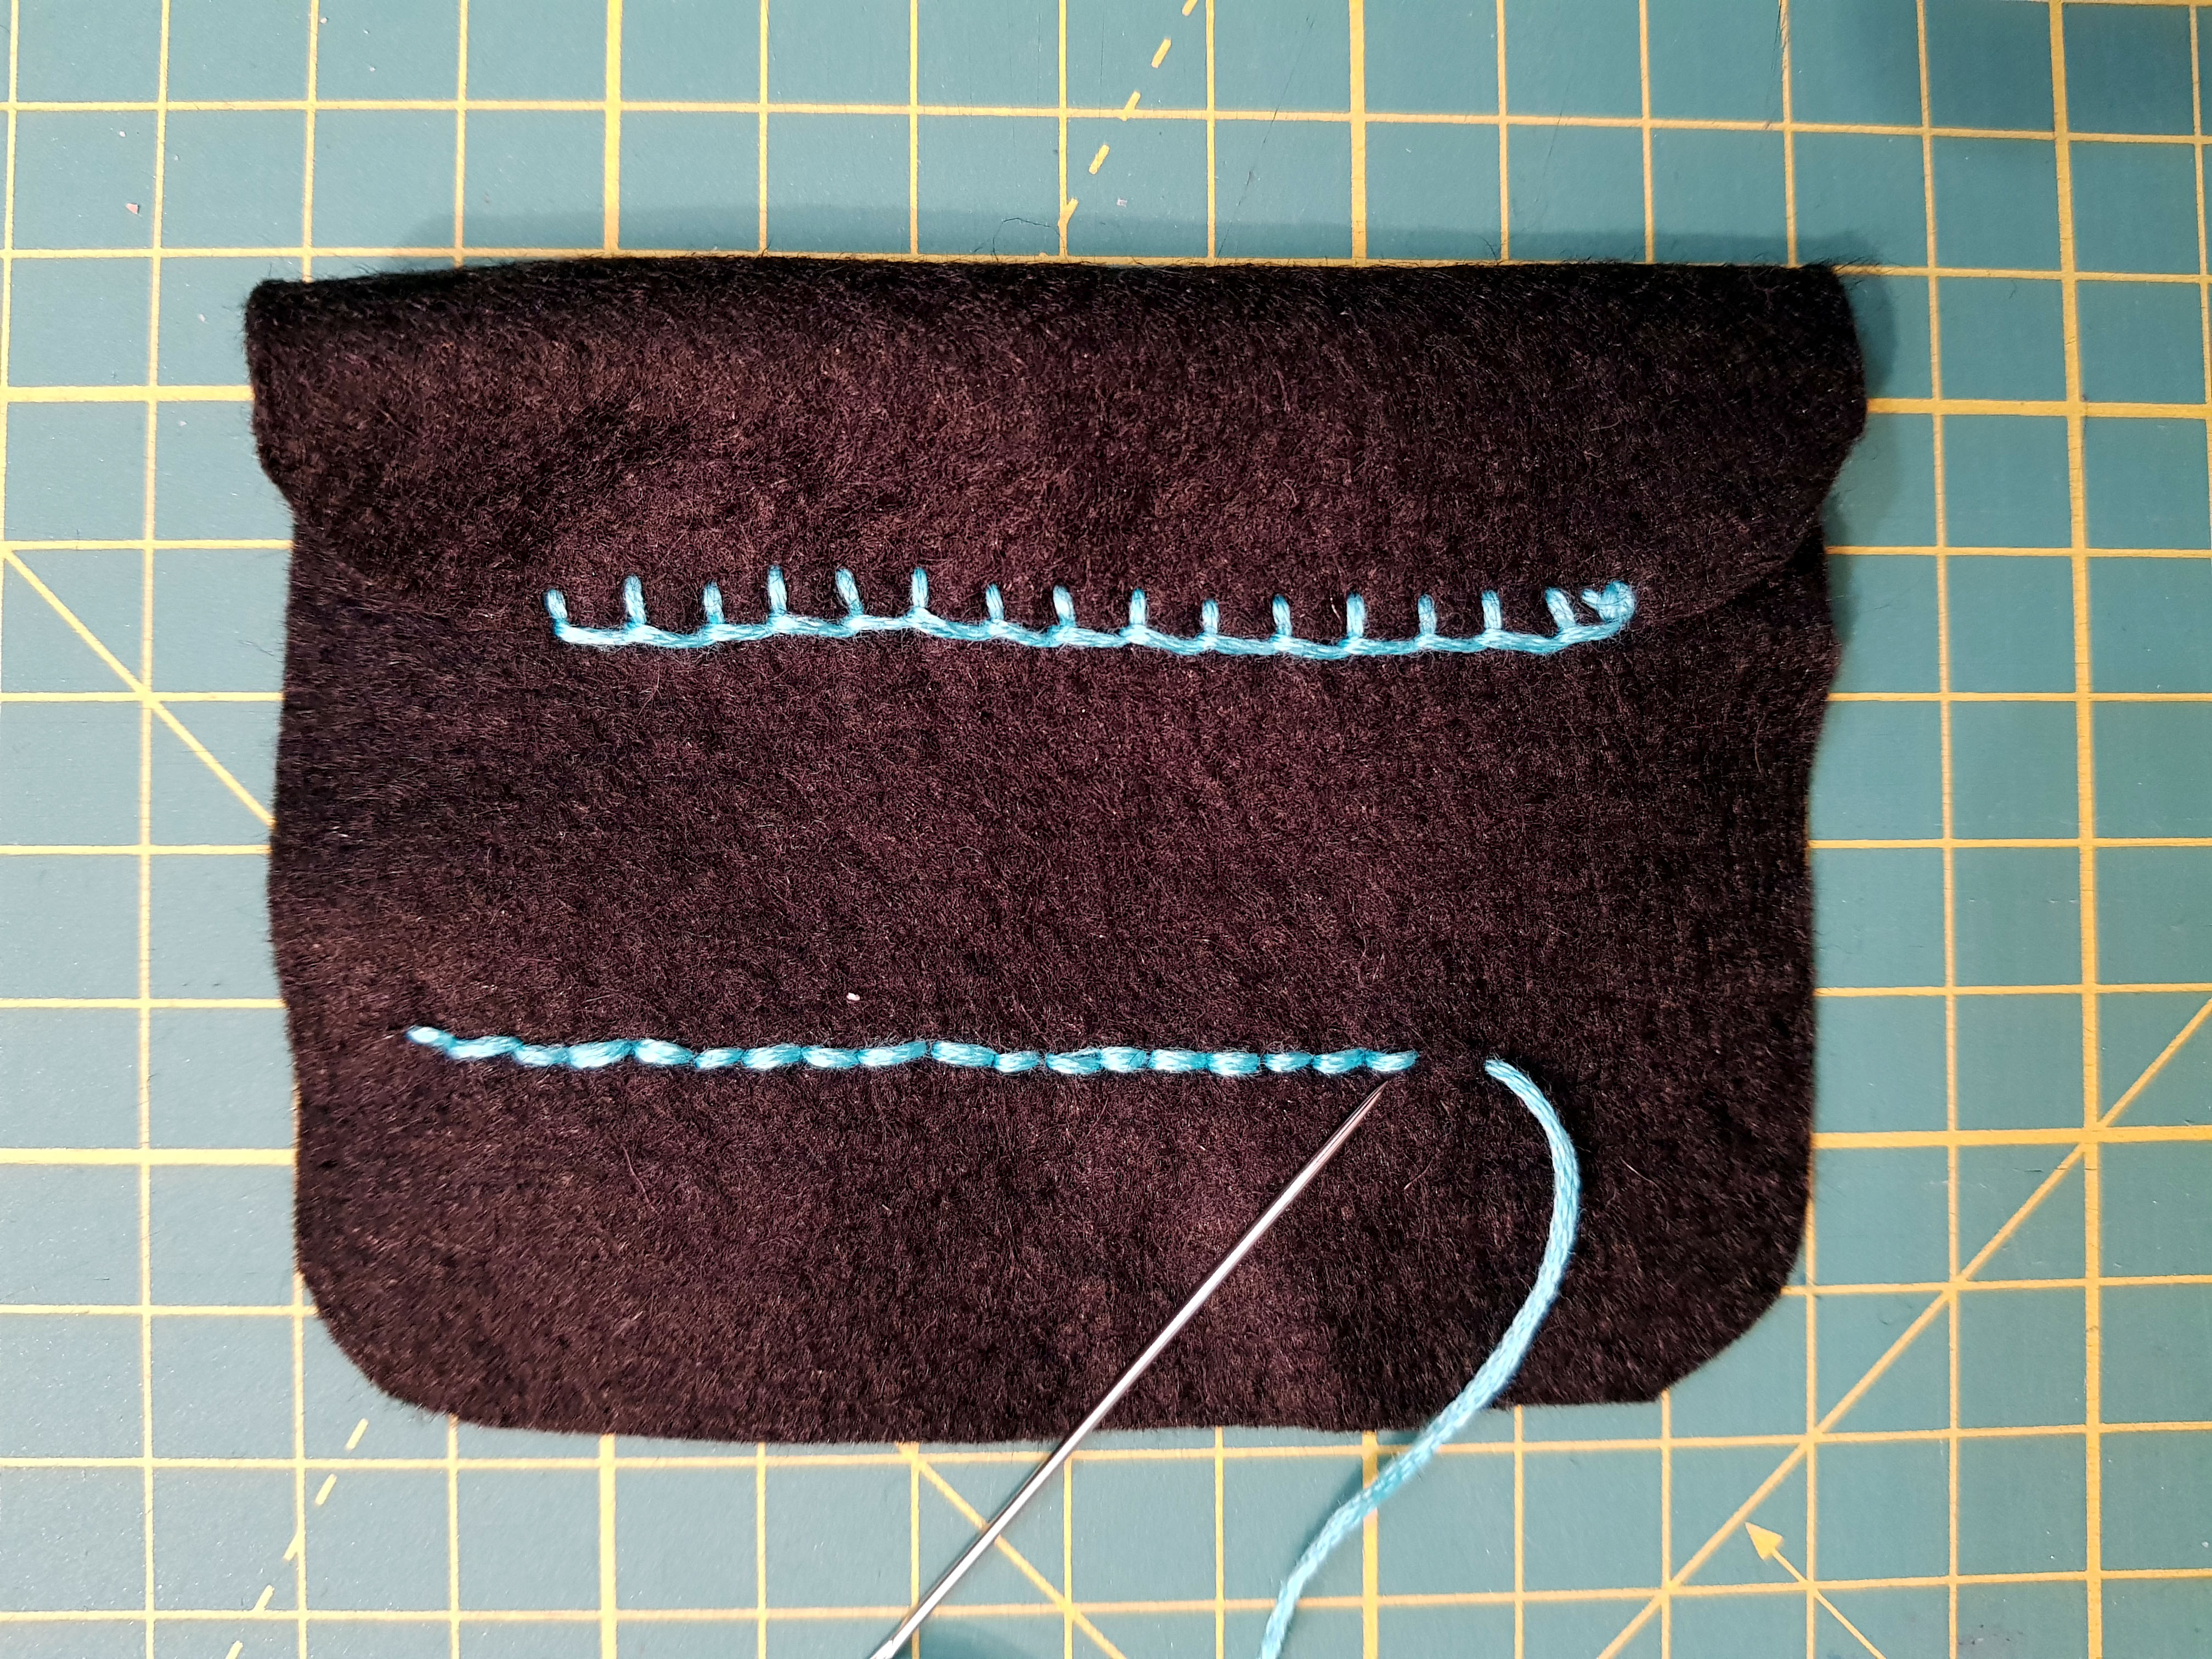
Blanket stitch
A decorative scalloped edge stitch which many of us would have used in the past in our school sewing projects (A skill I never mastered in my youth) using a length of thread knotted at the end thread your needle. Now bring your needle up from between the layers of fabric at your desired stitch depth, to hide the knot, to the front. Anchor your thread by bringing the needle back up from back to front at the same position remembering to thread your needle through the loop formed. Make your next stitch buy taking your needle down from top to back at your desired width and length while ensuring that your thread is under your needle point.
Pull tight to form your first scallop. Keep going until you reach your desired length before securing your stitching.
Back stitch
I use this stitch to form my inner seams. It’s a popular stitch for ensuring a strong join.
The secret here is to keep your stitches short and straight. Make your first simple up and down stitch at your desired stitch length before bringing your needle up again from the back at the distance of another stitch as if you would in a simple running stitch. Here you will now need to pass your needle back down through the end of the first stitch to form a consistent line of joined stitches.
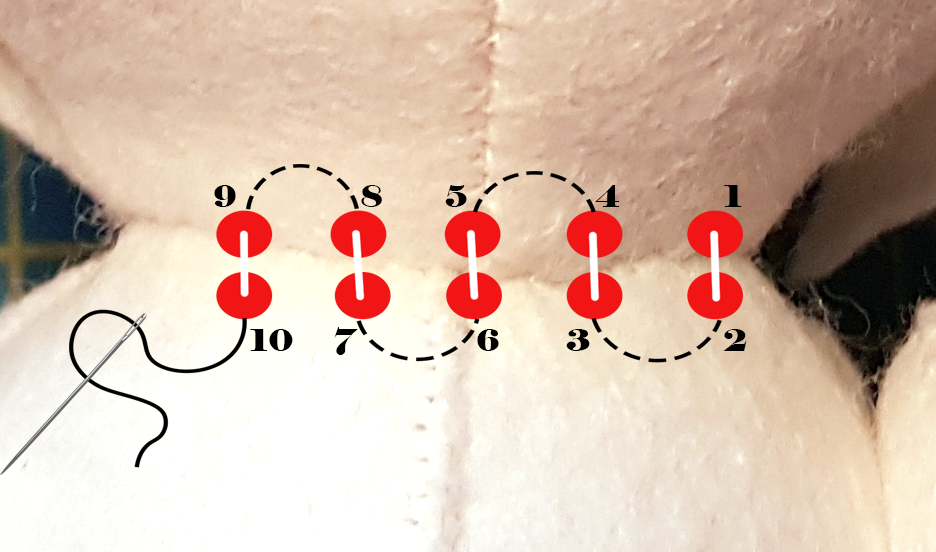
Ladder stitch
I use this stitch to attach the heads of my animals to their bodies as it is practically invisible. There are other stitches that you can use or you can freestyle but our aim is to hide our stitches and avoid Frankensteining our animals.
To do this stitch you will need to conceal your knotted end inside the head of your animal. Bring your needle out from the edge of the neck line of the head and take it down into your animal body bringing it up a short distance along and pulling it tight.
Next take your needle up and into the head of your animal taking the needle back up a short distance along. Keep going around (I do this twice) until you are happy that your animal head is securely attached.

SatiN stitch
I use this satin stitch to fill in sections on a design. Start by bringing your needle up from behind your work at the edge of the space you want to fill.
Re-insert your needle directly across from your last exit point. You'll be making stitches that span all the way across the shape. Start your next stitch, next to where you started your first stitch.
You want them as close to side-by-side as possible. Then re-insert across the space next to your other stitch and repeat until you have filled the space.